Blog
2024-02-20
Back in November, I wrote about making 2n-page zines.
Thanks to some conversations I had at Big MathsJam
in later November, I've been able to work out how many 128-page zines there are: 315434.
The insight
At Big MathsJam, Colin Beveridge pointed out
something he'd noticed about the possible zines: when drawing the line connecting the pages
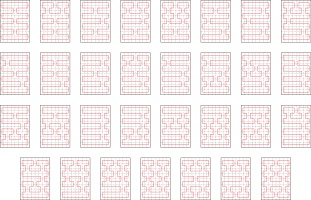
in order, there were some line segments that were always included. For example, here are all of the possible
64-page zines:
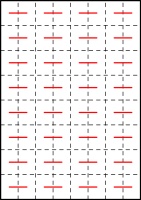
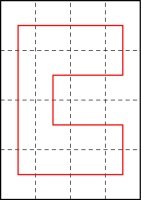
Every single one of these includes these line segments:
Colin conjectured that for a zine of any size, a pattern like this of alternative horizontal segments
must always be included. He was close to justifying this, and since MathsJam I've been able to fill
in the full justificication.
The justificiation
First, consider the left-most column of pages. They must be connected like this:
If they were connected in any other way, there would be two vertical connections in a row,
which would create a page that is impossible to open (as every other connection must be a horizontal
that ends up in the spine). Additionally, the horizontal lines in this diagram must all be in the
spine (as otherwise we again get pages that cannot be opened).
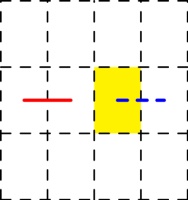
Next, consider a horizontal line that's in the spine (shown in red below), and we can look
at all the possible ways to draw the line through the highlighted page, paying particular
attention to the dashed blue line:
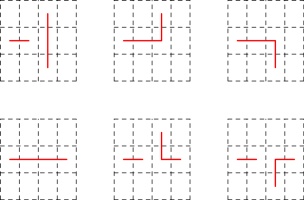
The six possible ways in which the line could travel through the highlighted page are:
The three options in the top row do not give a valid zine: the leftmost diagram has two vertical
connections in a row (leading to pages that do not open). The other two diagrams in the top row
have the horizontal line that we know is in the spine, followed by a horizontal line not in the
spine, then a vertial line: this vertical line should be in the spine, but as it is vertical
it cannot be (without making a page that doesn't open).
In each of the diagrams in the bottom row, the connection shown in dashed blue
is included and must be in the spine: in the leftmost diagram, the horizontal line that we know is in the spine
is followed by a horizontal not in the spine, then the horizinal in the dashed blue position
that must therefore be in the spine. The othe other two diagrams in the bottom row,
the dashed blue position is connected to a vertical line: this means that the dashed blue connection
must be in the spine (as otherwise the vertical would cause a page that doesn't open).
Overall, we've now shown that the leftmost column of lines must always be included and
must all be in the spine; and for each horizontal line in the spine, the line to the right of it
after a single gap must also be included and in the spine. From this, it follows that all the horizontal
lines in Colin's pattern must always be included.
Calculating the number of 128-page zines
Now that I knew that all these horizonal lines are always included, I was able to update
the code I was using to find all the possible zines
to use this. After a few hours, it had found all 315434 possibilites. I was very happy to get this
total, as it was the same as the number that
Luna (another attendee of Big MathsJam) had calculated but wasn't certain was correct.
The sequence of the number of 2n-page zines,
including the newly calculated number,
is now published on the OEIS.
I think calculating number of 256-page zines is still beyond my code though...
(Click on one of these icons to react to this blog post)
You might also enjoy...
Comments
Comments in green were written by me. Comments in blue were not written by me.
Add a Comment
2023-11-03
I showed off an unfinished version of the content in this blog post in the first
Finite Group live stream in October. I'll be showing off other upcoming things and other
content at future Finite Group events. If you'd like to watch this, you can sign up to our Patreon at
finitegroup.co.uk.
A few months ago at Cheltenham Science Festival, Hana Ayoob showed me how to make an 8-page zine.
If you've not make one before, I recommend following these steps now.
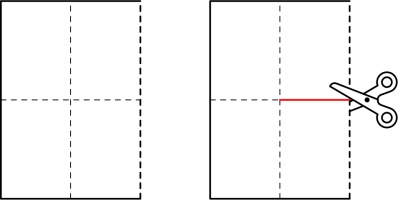
Take a piece of A4 paper, and fold it 3 times like this:
Unfold all the folds except the first one and cut along the red line:
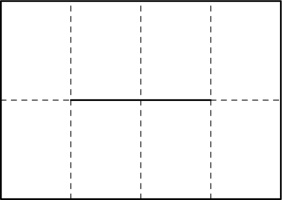
After unfolding, your paper should look like this:
Fold the paper in half the other way:
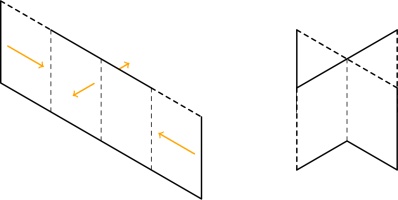
Push the two ends of the paper together so that the front of the middle bit of paper comes forward,
and the back goes backward:
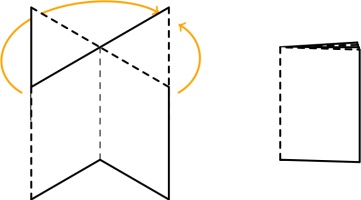
Finally, flatten all the pages and you have your zine:
You're now free to write or draw whatever you like on the 8 pages of your zine.
If you'd like to fold a zine that already has content printed on it, you can
print the instructions for the TMiP puzzle hunt that I wrote earlier this year, or you can print this blog post off in zine format.
A 16-page zine
If you're anything like me, you'll already be wondering if it's possible to do some more folding
and cutting to make a 16-page zine from a piece of A4. After some trial and error, I found that
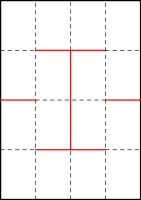
you can if you fold the paper 4 times then cut along these red lines:
(This time, I've drawn the diagram with a portrait piece of paper, as this leads to a portrait zine. For an 8-page zine, a landscape piece of paper led to a portrait zine.)
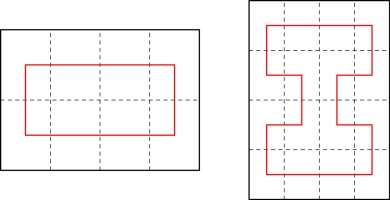
Instead of drawing which lines we need to cut, we can represent our two zines so far by drawing
lines that connect the pages in order:
During my experimentation, I saw that every second connection between pages must be horizontal.
These horizontal connections end up in the spine of the zine and allow the pages to turn.
If you can't visualise why the pages won't turn if this condition doesn't hold, try making a 16-page
zine like this:
Now that we can make a 16-page zine, the obvious question is: can we make a 32-page zine?
To answer this, we need to look for lines that go through all
32 pages where every second connection is a horizontal. I wrote a Python script to look for these and it
found 3:
The code also told me that the 8- and 16-page zines we know about are the only 8- and 16-page
zines. I'm only counting the zines where the pages in the final zine are portrait, and have the same side ratio a the original piece of A4 paper:
there will be other possible zines where the pages are landscape that we aren't counting.
2n-page zines
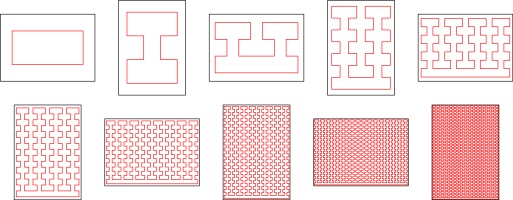
Now that we have 8-page, 16-page, and 32-page zines, we can look for patterns that we
can generalise to make a 2n-page zine. This generalisation was the first I
came up with:
There are, of course, many other generalisations that you could come up with.
How many zines?
While working towards our generalised zine, you may have started pondering another question:
for any given n, how many different 2n-page zines can be made?
For n=2, there's only one way to make a zine (fold the paper twice).
For n=3 to 6, we've already seen that there are 1, 1, and 3 ways to make zines. The code
I wrote was also able to tell me that there are 31 possible 64-page zines:
So the start of the sequence of the number of possible zines is: 1, 1, 1, 3, 31.
The number of different possible paths to check increases very quickly as we increase
n, so I was unable to compute the next term in a reasonable amount of time.
I've submitted this sequence to the OEIS. Let's
hope someone is able to work out the next term. If you're that someone, let me know!
(Click on one of these icons to react to this blog post)
You might also enjoy...
Comments
Comments in green were written by me. Comments in blue were not written by me.
Add a Comment
2017-03-08
This post appeared in issue 05 of Chalkdust. I strongly
recommend reading the rest of Chalkdust.
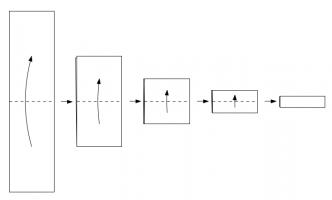
Take a long strip of paper. Fold it in half in the same direction a few times. Unfold it and look at the shape the edge of the paper
makes. If you folded the paper \(n\) times, then the edge will make an order \(n\) dragon curve, so called because it faintly resembles a
dragon. Each of the curves shown on the cover of issue 05 of Chalkdust is an order 10 dragon
curve.
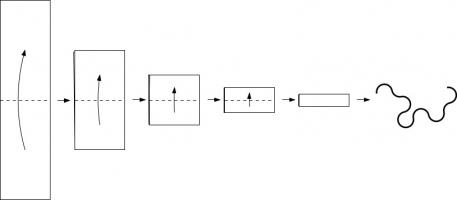
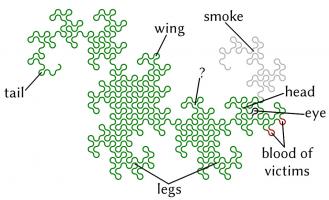
Top: Folding a strip of paper in half four times leads to an order four dragon curve (after rounding the corners). Bottom: A level 10 dragon curve resembling a dragon.
The dragon curves on the cover show that it is possible to tile the entire plane with copies of dragon curves of the same order. If any
readers are looking for an excellent way to tile a bathroom, I recommend getting some dragon curve-shaped tiles made.
An order \(n\) dragon curve can be made by joining two order \(n-1\) dragon curves with a 90° angle between their tails. Therefore, by
taking the cover's tiling of the plane with order 10 dragon curves, we may join them into pairs to get a tiling with order 11 dragon
curves. We could repeat this to get tilings with order 12, 13, and so on... If we were to repeat this ad infinitum we would arrive
at the conclusion that an order \(\infty\) dragon curve will cover the entire plane without crossing itself. In other words, an order
\(\infty\) dragon curve is a space-filling curve.
Like so many other interesting bits of recreational maths, dragon curves were popularised by Martin Gardner in one of his Mathematical Games columns in Scientific
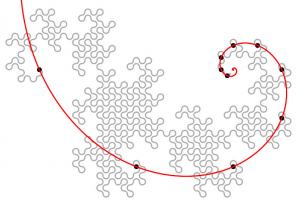
American. In this column, it was noted that the endpoints of dragon curves of different orders (all starting at the same point) lie on
a logarithmic spiral. This can be seen in the diagram below.
Although many of their properties have been known for a long time and are well studied, dragon curves continue to appear in new and
interesting places. At last year's Maths Jam conference, Paul Taylor gave a talk about my favourite surprise occurrence of
a dragon.
Normally when we write numbers, we write them in base ten, with the digits in the number representing (from right to left) ones, tens,
hundreds, thousands, etc. Many readers will be familiar with binary numbers (base two), where the powers of two are used in the place of
powers of ten, so the digits represent ones, twos, fours, eights, etc.
In his talk, Paul suggested looking at numbers in base -1+i (where i is the square root of -1; you can find more adventures of i here) using the digits 0 and 1. From right to left, the columns of numbers in this
base have values 1, -1+i, -2i, 2+2i, -4, etc. The first 11 numbers in this base are shown below.
| Number in base -1+i | Complex number |
| 0 | 0 |
| 1 | 1 |
| 10 | -1+i |
| 11 | (-1+i)+(1)=i |
| 100 | -2i |
| 101 | (-2i)+(1)=1-2i |
| 110 | (-2i)+(-1+i)=-1-i |
| 111 | (-2i)+(-1+i)+(1)=-i |
| 1000 | 2+2i |
| 1001 | (2+2i)+(1)=3+2i |
| 1010 | (2+2i)+(-1+i)=1+3i |
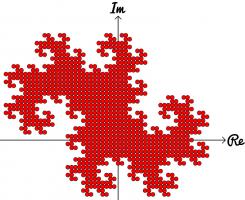
Complex numbers are often drawn on an Argand diagram: the real part of the number is plotted on the horizontal axis and the imaginary part
on the vertical axis. The diagram to the left shows the numbers of ten digits or less in base -1+i on an Argand diagram. The points form
an order 10 dragon curve! In fact, plotting numbers of \(n\) digits or less will draw an order \(n\) dragon curve.
Brilliantly, we may now use known properties of dragon curves to discover properties of base -1+i. A level \(\infty\) dragon curve covers
the entire plane without intersecting itself: therefore every Gaussian integer (a number of the form \(a+\text{i} b\) where \(a\) and
\(b\) are integers) has a unique representation in base -1+i. The endpoints of dragon curves lie on a logarithmic spiral: therefore
numbers of the form \((-1+\text{i})^n\), where \(n\) is an integer, lie on a logarithmic spiral in the complex plane.
If you'd like to play with some dragon curves, you can download the Python code used
to make the pictures here.
(Click on one of these icons to react to this blog post)
You might also enjoy...
Comments
Comments in green were written by me. Comments in blue were not written by me.
Add a Comment
2016-09-06
This is the fifth post in a series of posts about tube map folding.
After my talk at Electromagnetic Field 2014, I was sent a copy of
MC Escher Kaleidocycles by Doris Schattschneider and Wallace Walker (thanks Bob!).
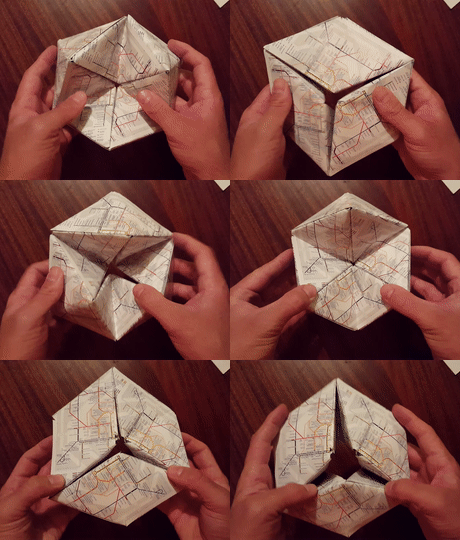
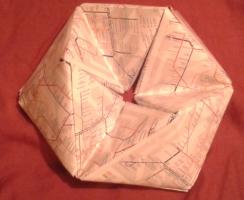
A kaleidocycle is a bit like a 3D flexagon:
it can be flexed to reveal different parts of itself.
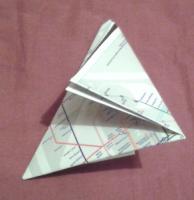
In this blog post, I will tell you how to make a kaleidocycle from tube maps.
You will need
- 12 tube maps
- glue
Making the modules
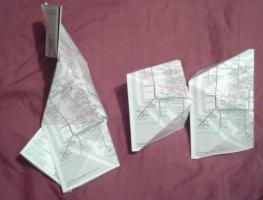
First, fold the cover of a tube map over. This will allow you to have the tube
map (and not just its cover) on the faces of your shape.
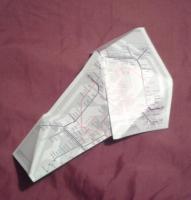
With the side you want to see facing down, fold the map so that two
opposite corners touch.
For this step, there is a choice of which two corners to connect: leading to
a right-handed and a left-handed piece. You should make 6 of each type for your
kaleidocycle.
Finally, fold the overhanding bits over to complete your module.
The folds you made when connecting opposite corners will need to fold both
ways when you flex your shape, so it is worth folding them both ways a few times
now before continuing.
Putting it together
Once you have made 12 modules (with 6 of each handedness), you are ready
to put the kaleidocycle together.
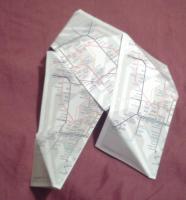
Take two tube maps of each handedness and tuck them together in a line.
Each map is tucked into one of the opposite handedness.
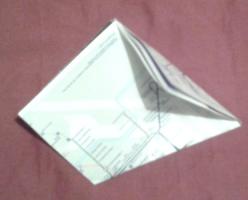
The four triangles across the middle form a net of a tetrahedron. Complete
the tetrahedron by putting the last tab into the first triangle. Glue these
together.
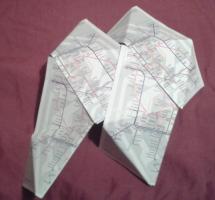
Take two more tube maps of the opposite handedness to those at the top of the tetrahedron.
Fit them into the two triangles poking out of the top of the tetrahedron to
make a second tetrahedron.
Repeat this until you have five connected tetrahedra. Finally, connect the
triangles poking out of the top and the bottom to make your kaleidocycle.
Previous post in series
This is the fifth post in a series of posts about tube map folding.
(Click on one of these icons to react to this blog post)
You might also enjoy...
Comments
Comments in green were written by me. Comments in blue were not written by me.
Add a Comment
2016-03-30
Take a piece of paper. Fold it in half in the same direction many times. Now unfold it. What pattern will the folds make?
I first found this question in one of Martin Gardner's books. At first, you might that the answer will be simple, but if you look at the shapes made for a few folds, you will see otherwise:
The curves formed are called dragon curves as they allegedly look like dragons with smoke rising from their nostrils. I'm not sure I see the resemblance:
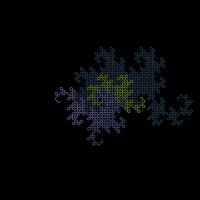
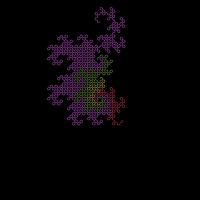
As you increase the order of the curve (the number of times the paper was folded), the dragon curve squiggles across more of the plane, while never crossing itself. In fact, if the process was continued forever, an order infinity dragon curve would cover the whole plane, never crossing itself.
This is not the only way to cover a plane with dragon curves: the curves tessellate.
When tiled, this picture demonstrates how dragon curves tessellate. For a demonstration, try obtaining infinite lives...
Dragon curves of different orders can also fit together:
To generate digital dragon curves, first notice that an order \(n\) curve can be made from two order \(n-1\) curves:
This can easily be seen to be true if you consider folding paper: If you fold a strip of paper in half once, then \(n-1\) times, each half of the strip will have made an order \(n-1\) dragon curve. But the whole strip has been folded \(n\) times, so is an order \(n\) dragon curve.
Because of this, higher order dragons can be thought of as lots of lower order dragons tiled together. An the infinite dragon curve is actually equivalent to tiling the plane with a infinite number of dragons.
If you would like to create your own dragon curves, you can download the Python code I used to draw them from GitHub. If you are more of a thinker, then you might like to ponder what difference it would make if the folds used to make the dragon were in different directions.
(Click on one of these icons to react to this blog post)
You might also enjoy...
Comments
Comments in green were written by me. Comments in blue were not written by me.
Add a Comment

