Blog
2016-10-08
During my Electromagnetic Field talk this year, I spoke about @mathslogicbot (now reloated to @logicbot@mathstodon.xyz and @logicbot.bsky.social), my Twitter bot that is working its way through the tautologies in propositional calculus. My talk included my conjecture that the number of tautologies of length \(n\) is an increasing sequence (except when \(n=8\)). After my talk, Henry Segerman suggested that I also look at the number of contradictions of length \(n\) to look for insights.
A contradiction is the opposite of a tautology: it is a formula that is False for every assignment of truth values to the variables. For example, here are a few contradictions:
$$\neg(a\leftrightarrow a)$$
$$\neg(a\rightarrow a)$$
$$(\neg a\wedge a)$$
$$(\neg a\leftrightarrow a)$$
The first eleven terms of the sequence whose \(n\)th term is the number of contradictions of length \(n\) are:
$$0, 0, 0, 0, 0, 6, 2, 20, 6, 127, 154$$
This sequence is A277275 on OEIS. A list of contractions can be found here.
For the same reasons as the sequence of tautologies, I would expect this sequence to be increasing. Surprisingly, it is not increasing for small values of \(n\), but I again conjecture that it is increasing after a certain point.
Properties of the sequences
There are some properties of the two sequences that we can show. Let \(a(n)\) be the number of tautolgies of length \(n\) and let \(b(n)\) be the number of contradictions of length \(n\).
First, the number of tautologies and contradictions, \(a(n)+b(n)\), (A277276) is an increasing sequence. This is due to the facts that \(a(n+1)\geq b(n)\) and \(b(n+1)\geq a(n)\), as every tautology of length \(n\) becomes a contraction of length \(n+1\) by appending a \(\neg\) to be start and vice versa.
This implies that for each \(n\), at most one of \(a\) and \(b\) can be decreasing at \(n\), as if both were decreasing, then \(a+b\) would be decreasing. Sadly, this doesn't seem to give us a way to prove the conjectures, but it is a small amount of progress towards them.
Edit: Added Mastodon and Bluesky links
(Click on one of these icons to react to this blog post)
You might also enjoy...
Comments
Comments in green were written by me. Comments in blue were not written by me.
Add a Comment
2016-09-06
This is the fifth post in a series of posts about tube map folding.
After my talk at Electromagnetic Field 2014, I was sent a copy of
MC Escher Kaleidocycles by Doris Schattschneider and Wallace Walker (thanks Bob!).
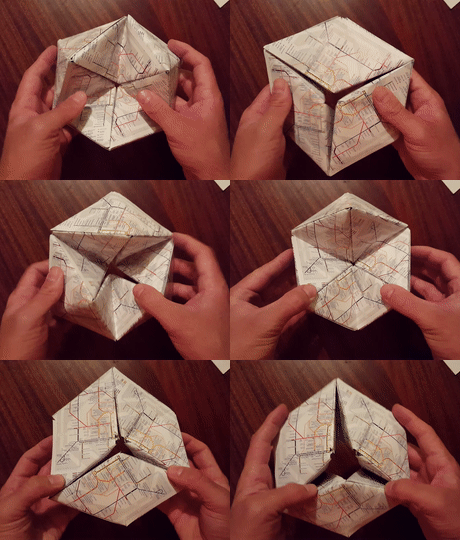
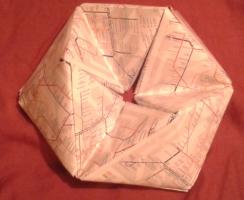
A kaleidocycle is a bit like a 3D flexagon:
it can be flexed to reveal different parts of itself.
In this blog post, I will tell you how to make a kaleidocycle from tube maps.
You will need
- 12 tube maps
- glue
Making the modules
First, fold the cover of a tube map over. This will allow you to have the tube
map (and not just its cover) on the faces of your shape.
With the side you want to see facing down, fold the map so that two
opposite corners touch.
For this step, there is a choice of which two corners to connect: leading to
a right-handed and a left-handed piece. You should make 6 of each type for your
kaleidocycle.
Finally, fold the overhanding bits over to complete your module.
The folds you made when connecting opposite corners will need to fold both
ways when you flex your shape, so it is worth folding them both ways a few times
now before continuing.
Putting it together
Once you have made 12 modules (with 6 of each handedness), you are ready
to put the kaleidocycle together.
Take two tube maps of each handedness and tuck them together in a line.
Each map is tucked into one of the opposite handedness.
The four triangles across the middle form a net of a tetrahedron. Complete
the tetrahedron by putting the last tab into the first triangle. Glue these
together.
Take two more tube maps of the opposite handedness to those at the top of the tetrahedron.
Fit them into the two triangles poking out of the top of the tetrahedron to
make a second tetrahedron.
Repeat this until you have five connected tetrahedra. Finally, connect the
triangles poking out of the top and the bottom to make your kaleidocycle.
Previous post in series
This is the fifth post in a series of posts about tube map folding.
(Click on one of these icons to react to this blog post)
You might also enjoy...
Comments
Comments in green were written by me. Comments in blue were not written by me.
Add a Comment
2016-06-29
Since Electromagnetic Field 2014, I have been slowly making
progress on a recreational math problem about braiding. In this blog post, I
will show you the type of braid I am interested in and present the problem.
Making an (8,3) braid
To make what I will later refer to as an (8,3) braid, you will need:
- 7 lengths of coloured wool, approx 50cm each
- Cardboard
- Scissors
- A pencil
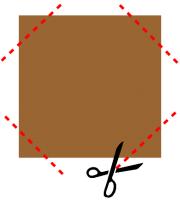
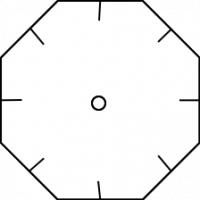
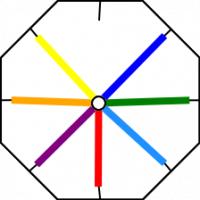
First, cut an octagon from the cardboard. The easiest way to do this is
to start with a rectangle, then cut its corners off.
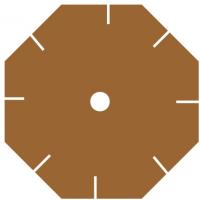
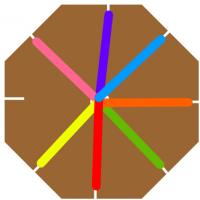
Next, use the pencil to punch a hole in the middle of your octagon and
cut a small slit in each face of the octagon.
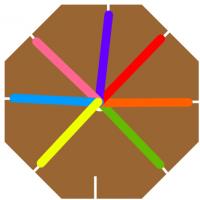
Now, tie the ends of your wool together, and put them through the hole.
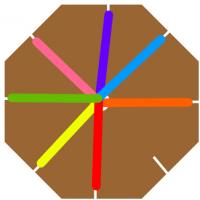
pull each strand of wool into one of the slits.
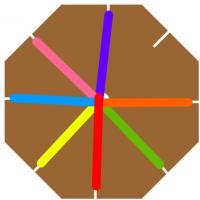
Now you are ready to make a braid. Starting from the empty slit, count around
to the third strand of will. Pull this out of its slit then into the empty slit.
Then repeat this starting at the newly empty slit each time. After a short time,
a braid should form through the hole in the cardboard.
I call the braid you have just made the (8,3) braid, as there are 8 slits and
you move the 3rd strand each time. After I first made on of these braid, I began
to wonder what was special about 8 and 3 to make this braid work, and for what
other numbers \(a\) and \(b\) the (\(a\),\(b\)) would work.
In my next blog post, I will give two conditions on \(a\) and \(b\) that cause
the braid to fail. Before you read that, I recommend having a go at the problem
yourself. To help you on your way, I am compiling a list of braids that are known
to work or fail at mscroggs.co.uk/braiding. Good luck!
(Click on one of these icons to react to this blog post)
You might also enjoy...
Comments
Comments in green were written by me. Comments in blue were not written by me.
Add a Comment
2015-01-31
This is the third post in a series of posts about tube map folding.
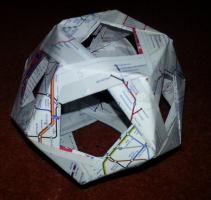
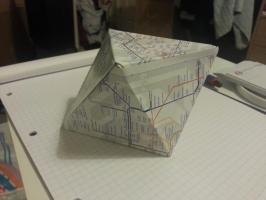
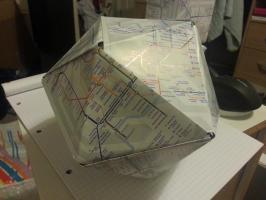
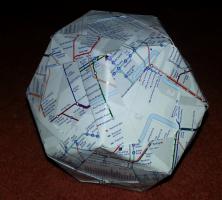
In 2012, I folded all the Platonic solids from tube maps. The dodecahedron I made was a little dissapointing:
After my talk at Electromegnetic Field 2014, I was shown the following better method to fold a dodecahedron.
Making the modules
First, take a tube map, cut apart all the pages and cut each page in half.
Next, take one of the parts and fold it into four
then lay it flat.
Next, fold the bottom left corner upwards
and the top right corner downwards.
Finally, fold along the line shown below.
You have now made a module which will make up one edge of the dodecahedron. You will need 30 of these to make the full solid.
Once many modules have been made, then can be put together. To do this, tuck one of the corners you folded over into the final fold of another module.
Three of the modules attached like this will make a vertex of the dodecahedron.
By continuing to attach modules, you will get the shell of a dodecahedron.
To make the dodecahedron look more complete, fold some more almost-squares of tube map to be just larger than the holes and tuck them into the modules.
Previous post in series
This is the third post in a series of posts about tube map folding.
Next post in series
(Click on one of these icons to react to this blog post)
You might also enjoy...
Comments
Comments in green were written by me. Comments in blue were not written by me.
Add a Comment
2014-09-04
Last weekend, I attended Electromagnetic Field, a camp for hackers, geeks, makers and the interested. On the Sunday, I gave a talk on four mathematical ideas/tasks which I have encountered over the past few years: Flexagons, Folding Tube Maps, Braiding and Sine Curves. I'd love to see photos, hear stories, etc from anyone who tries these activities: either comment on here or tweet @mscroggs.
Flexagons
It's probably best to start by showing you what a flexagon is...
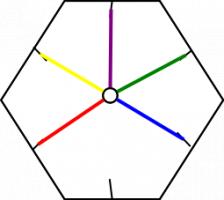
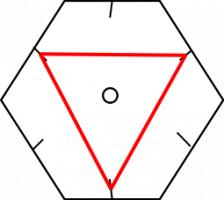
What you saw there is called a trihexaflexagon. Tri- because it has three faces; -hexa- because it is a hexagon; and -flexagon because it can be flexed to reveal the other faces.
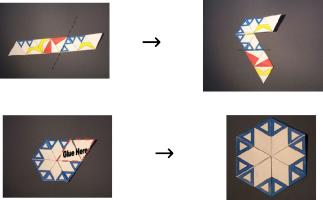
The story goes that, in 1939, Arthur H. Stone, who was an Englishman studying mathematics at Princeton, was trimming the edges off his American paper to fit in his English folder. He was fiddling with the offcuts and found that if he folded the paper under itself in a loop, he could make a hexagon; and when this hexagon was folded up as we saw, it would open out to reveal a different face.
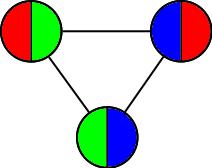
The way it flexes can be shown on a diagram: In the circles, the colour on either side of the flexagon is shown and the lines show flexes which can be made.
When Stone showed his flexagon to other students at Harvard, they were equally amazed by it, and they formed what they called 'The Flexagon Committee'. Members of the committee included Richard Feynman, who was then still a graduate student. The committee could meet regularly and soon discovered other flexagons, the first of which was the hexahexaflexagon: Again shaped like a hexagon, but this time with six faces.
A hexahexaflexagon is created by taking a longer strip of paper and rolling it around itself like this. The shorter strip at the end is then folded and glued in the same way the trihexaflexagon was. Once made, the hexahexaflexagon can be flexed. From some positions, the flexagon can be flexed in different ways to reveal different faces. Due to this, finding some of the faces can be quite difficult.
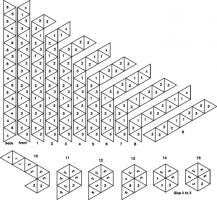
The committee went on to find other flexagons which could be made, again made by first folding into a shorter strip, then folding up like the trihexaflexagon.
The committee later found that hexaflexagons with any number of faces could be made by starting with a certain shaped strip, rolling it up then folding it like a trihexaflexagon.
Resources & further reading
An excellent article by Martin Gardner on flexagons can be found in this book.
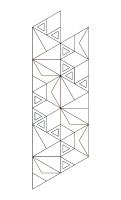
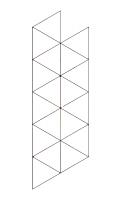
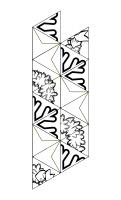
Trihexaflexagon templates (click to enlarge then print):
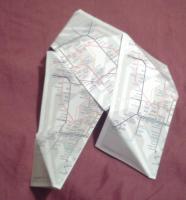
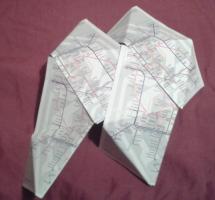
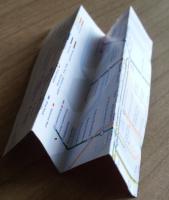
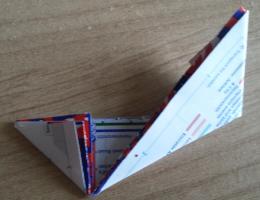
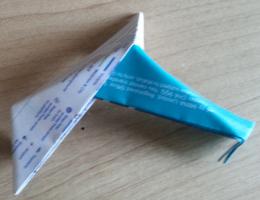
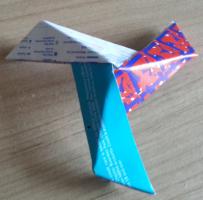
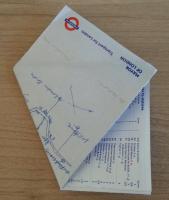
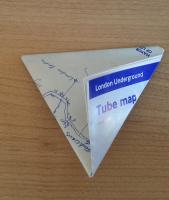
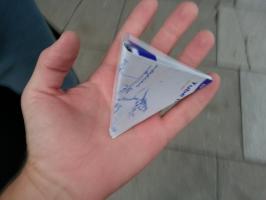
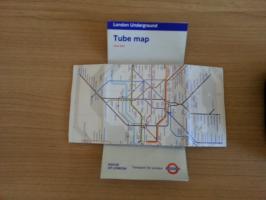
Our second story starts with me sitting on the tube reading Alex's Adventures in Numberland by Alex Bellos on the tube. In his book, Alex describes how to fold a tetrahedron, or triangle-based pyramid, from two business cards. With no business cards to hand, I picked up two tube maps and followed the steps: first, I folded it corner to corner; then I folded the overlaps over.I made another one of these, but the second a mirror image of the first, slotted them together and I had my tetrahedron.
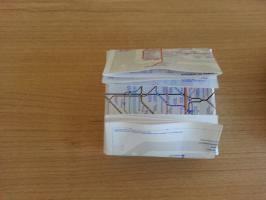
Then I made a tube map cube by making six squares like so and slotting them together.
While making these shapes, I discovered an advantage of tube maps over business cards: Due to the pages, folded tube maps have slots to tuck the tabs into, so the solids are pretty sturdy.
Making these shapes got me wondering: what other Platonic solids could I make?
In 2D, we have regular shapes: shapes with all the sides of the same length and all angles equal. Platonic solids are sort of the 3D equivalent of this: they are 3D shapes where every face is the same regular shape and at each vertex the same number of faces meet.
For example, our tetrahedron is a Platonic solid because every side is a regular triangle, and three triangles meet at every vertex. Our cube is a Platonic solid because every side is a square (which is a regular shape) and three squares meet at every vertex.
In order to fold all the Platonic solids, we must first find out how many there are.
To do this, we're going to start with a triangle, as it is the 2D shape with the smallest number of sides, and make Platonic solids.
If we try to put two triangles at each vertex, then they'll squash flat; so that's no good. We've seen that three triangles at each vertex makes a tetrahedron. If we put four triangles at each vertex then we get an octahedron.
Five triangles at each vertex gives us an icosahedron.
Each angles in an equilateral triangle is 60°. So if we put six triangles at each vertex the angles add up to 360°, a full turn. This means that the triangles will lie flat, giving us a nice pattern for a kitchen floor, but not a solid. Any more than 6 triangles will add up to more than 360 and also not give a solid. So we have found all the Platonic solids whose faces are triangles.
Next, four sided faces. Three squares at each vertex gives us a cube. Four squares at each vertex will add up to 4 times 90°... 360° again, so another kitchen floor and as before we have all the Platonic solids whose faces are squares.
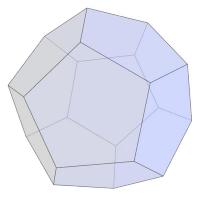
Now moving up again to five sided faces. Three pentagons at each vertex will gives us a dodecahedron, which looks like this.
This is the best I could do.
(After the talk, I was shown a few better ways to fold pentagons. Watch this space for my attempts...) Now if we try four pentagons around a vertex: the internal angle in a pentagon is 108°. 4 times 108° is 432°. This is more than a full turn, so we don't get a solid.
Moving up again, if we take three hexagons we get another tessellation. Shapes with more than six sides will all have larger angles than this so three make more than a full turn.
Therefore, we have found and folded all the Platonic solids.
In 2012, I posted this on my blog and got the following comment:
I'm pretty sure this was a joke, but one hour, 48 tube maps and a lot of glue later:
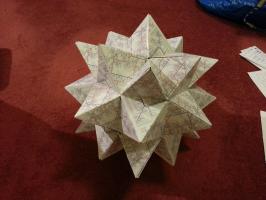
Resources & further reading
Alex's Adventures in Numberland by Alex Bellos introduced business card folding and takes it further, finishing with a business card Menger sponge.
Braiding
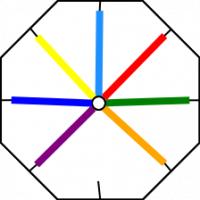
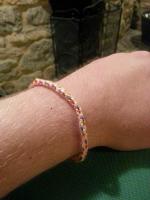
A few months ago, my mother showed my a way to make braids using a cardboard octagon with a slot cut on each side and a hole in the middle.
To make a braid, seven strands of wool are tied together, fed through the hole, then one tucked into each slot.
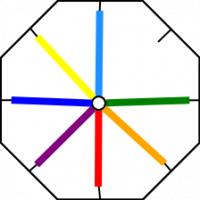
Now, we jump over two strands, pick the third strand and move it to the vacant slot. So first, we jump over the orange and green and move the red strand.
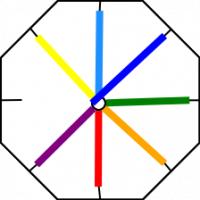
Then we jump the light blue and yellow and move the dark blue.
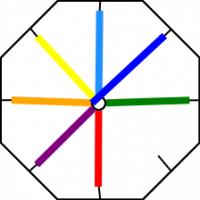
And so on..
After a while, the braid looks like this:
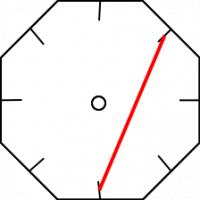
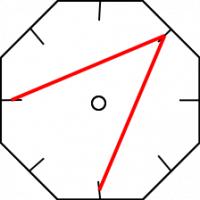
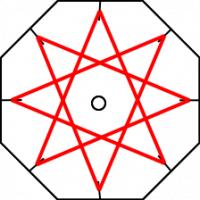
Once I'd made a few braids, I began to wonder which other numbers of threads could be used to make braids like this. To investigate this I found it useful to represent braids by drawing connections to show where a thread is moved. This shows the first move:
Then the second move:
And so on until you get:
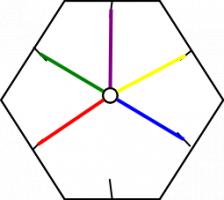
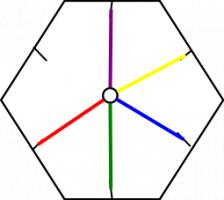
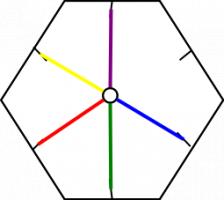
After the octagon, I tried braiding on a hexagon, moving the second thread each time. Here's what happened:
I only moved the yellow and green threads and nothing interesting happened. When I drew this out as before, it demonstrated what had gone wrong: three slots are missed so three threads are never moved.
So we need to find out when slots are missed and when all the slots are hit. To do this, let's call the number of slots \(a\), and let \(b\) be the number thread we pick each time. For example, in the first braid that worked \(a\) was 8 and \(b\) was 3.
First we'll label the slots. Label the slot which starts empty 0, then number anti-clockwise. This numbering puts all the multiples of \(a\) at the bottom slot.
Now let's look at which slots we visit. We start at0, then visit \(b\), then \(2b\), then \(3b\) and so on. We visit all the multiples of \(b\).
Therefore we will reach the bottom slot again and finish our loop when we reach a common multiple of \(a\) and \(b\). The first time this happens will be at the lowest common multiple, or:
$$\mbox{lcm}(a,b)$$
On our way to this slot, we visited one slot for every \(a\) we passed, so the number of slots we have visited is
$$\frac{\mbox{lcm}(a,b)}{a}$$
and we will visit every slot if
$$\frac{\mbox{lcm}(a,b)}{a}=b$$
or, equivalently if
$$\mbox{lcm}(a,b)=ab.$$
This is true when, \(a\) and \(b\) have no common factors, or in other words are coprime; which can be written
$$\mbox{hcf}(a,b)=1.$$
So we've found that if \(a\) is the number of slots and \(b\) is the jump then the braid will not work unless \(a\) and \(b\) are coprime.
For example, if \(a\) is 6 and \(b\) is 2 then 2 is a common factor so the braid fails. And, if \(a\) is 8 and \(b\) is 3 then there are no common factors and the braid works. And, if \(a\) is 12 and \(b\) is 5 then there are no common factors and the braid works.
But, if \(a\) is 5 and \(b\) is 2 then there are no common factors but the braid fails.
The rule I've explained is still correct, and explains why some braids fail. But if \(a\) and \(b\) are coprime, we need more rules to decide whether or not the braid works.
And that's as far as I've got, so I'm going to finish braiding with two open questions: Why does the 5 and 2 braid fail? And for which numbers \(a\) and \(b\) does the braid work?
Sine curves
For the last part of the talk, I did a practical demonstration of how to draw a sine curve using five people.
I told the first person to stand on the spot and the second person to stand one step away, hold a length of string and walk.
The third person was instructed to stay in line with the second person, while staying on a vertical line.
The fourth person was told to walk in a straight line at a constant speed.
And the fifth person had to stay in line with both the third and fourth people. This led them to trace a sine curve.
To explain why this is a sine curve, consider the following triangle:
As our first two people are one step apart, the hypotenuse of this triangle is 1. And so the opposite (vertical) side is equal to the sine of the angle.
I like to finish with a challenge, and this task leads nicely into two challenge questions:
1. How could you draw a cosine curve with five people?
2. How could you draw a tan(gent) curve with five people?
Resources & further reading
People Maths: Hidden Depths is full of this kind of dynamic task involving moving people.
(Click on one of these icons to react to this blog post)
You might also enjoy...
Comments
Comments in green were written by me. Comments in blue were not written by me.
Add a Comment


